Help
Visual Context
Screenshots help translators understand the context of the text they are translating. You can upload screenshots of your application and draw annotations on them to link specific areas to translation segments.
🔗Uploading Screenshots
Navigate to the File Manager tab in your project and click on the Screenshots sub-tab.
Click Upload a new screenshot to add images. Screenshots can be in PNG, JPG, or GIF format.
🔗Annotating Screenshots
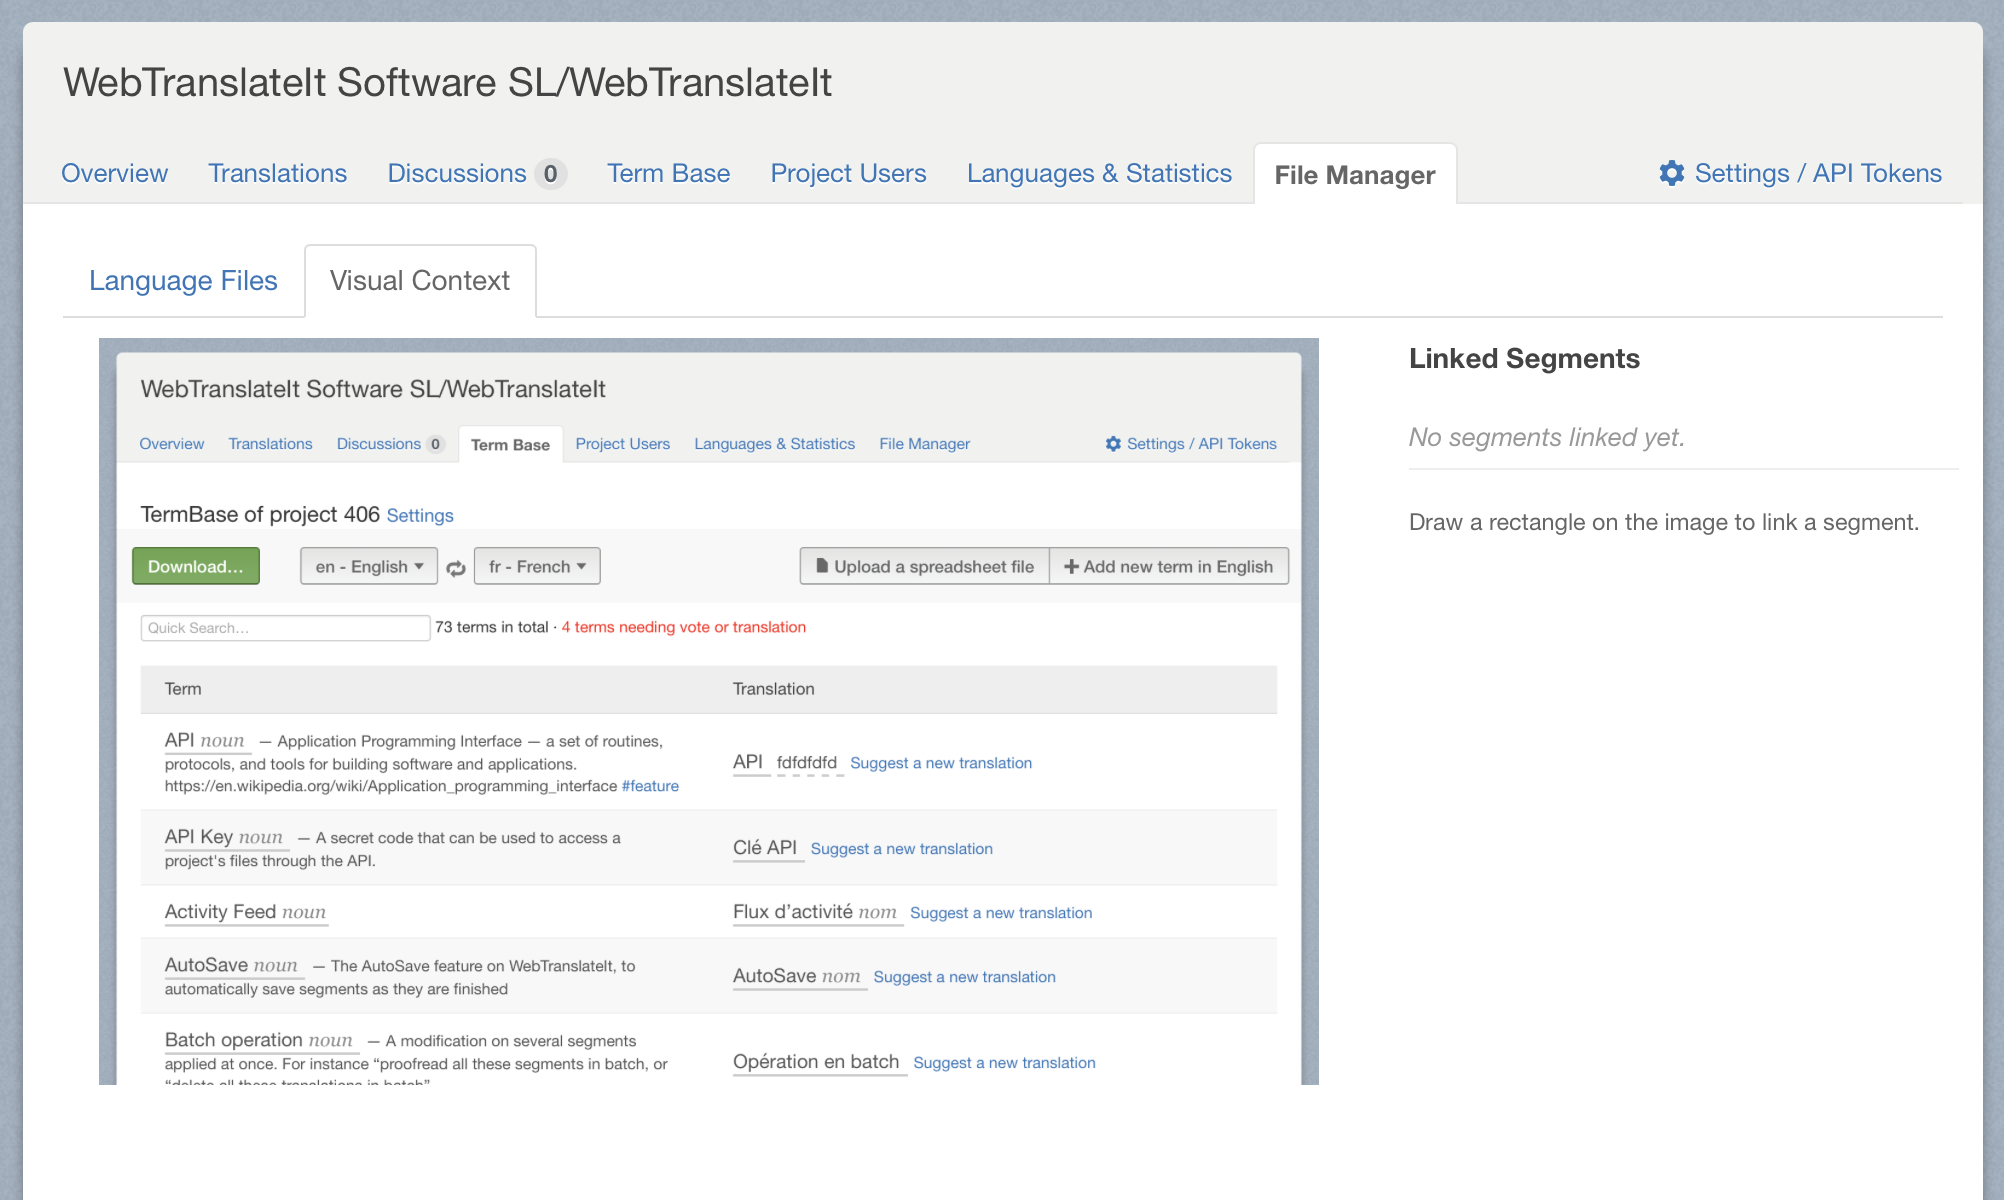
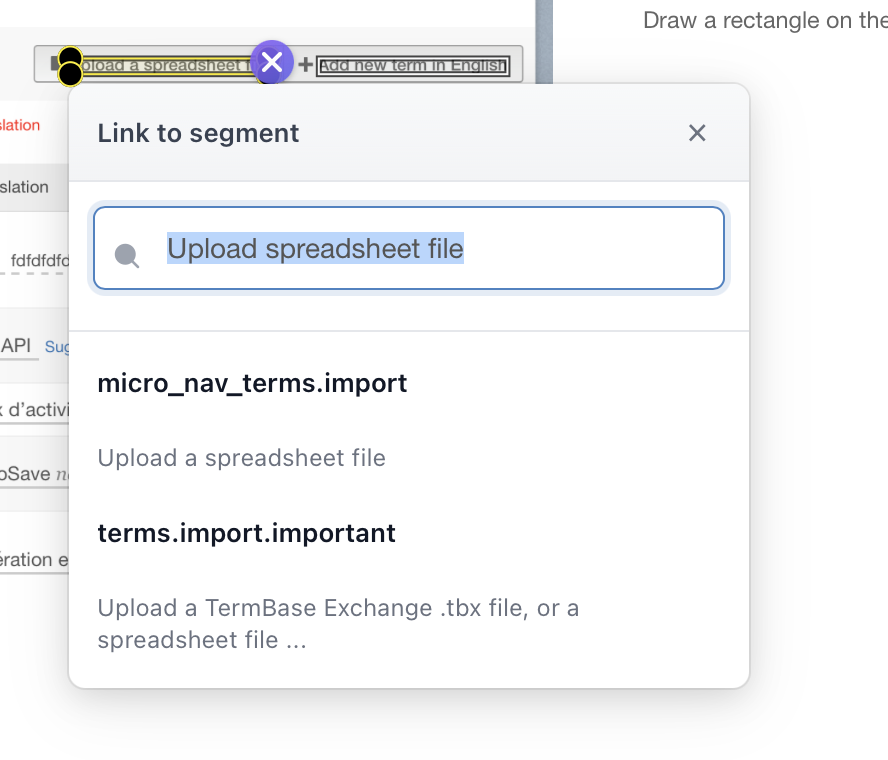
Click on a screenshot to open the annotation editor. Here you can draw rectangular annotations on the image and link them to translation segments.
🔗Manual Annotations
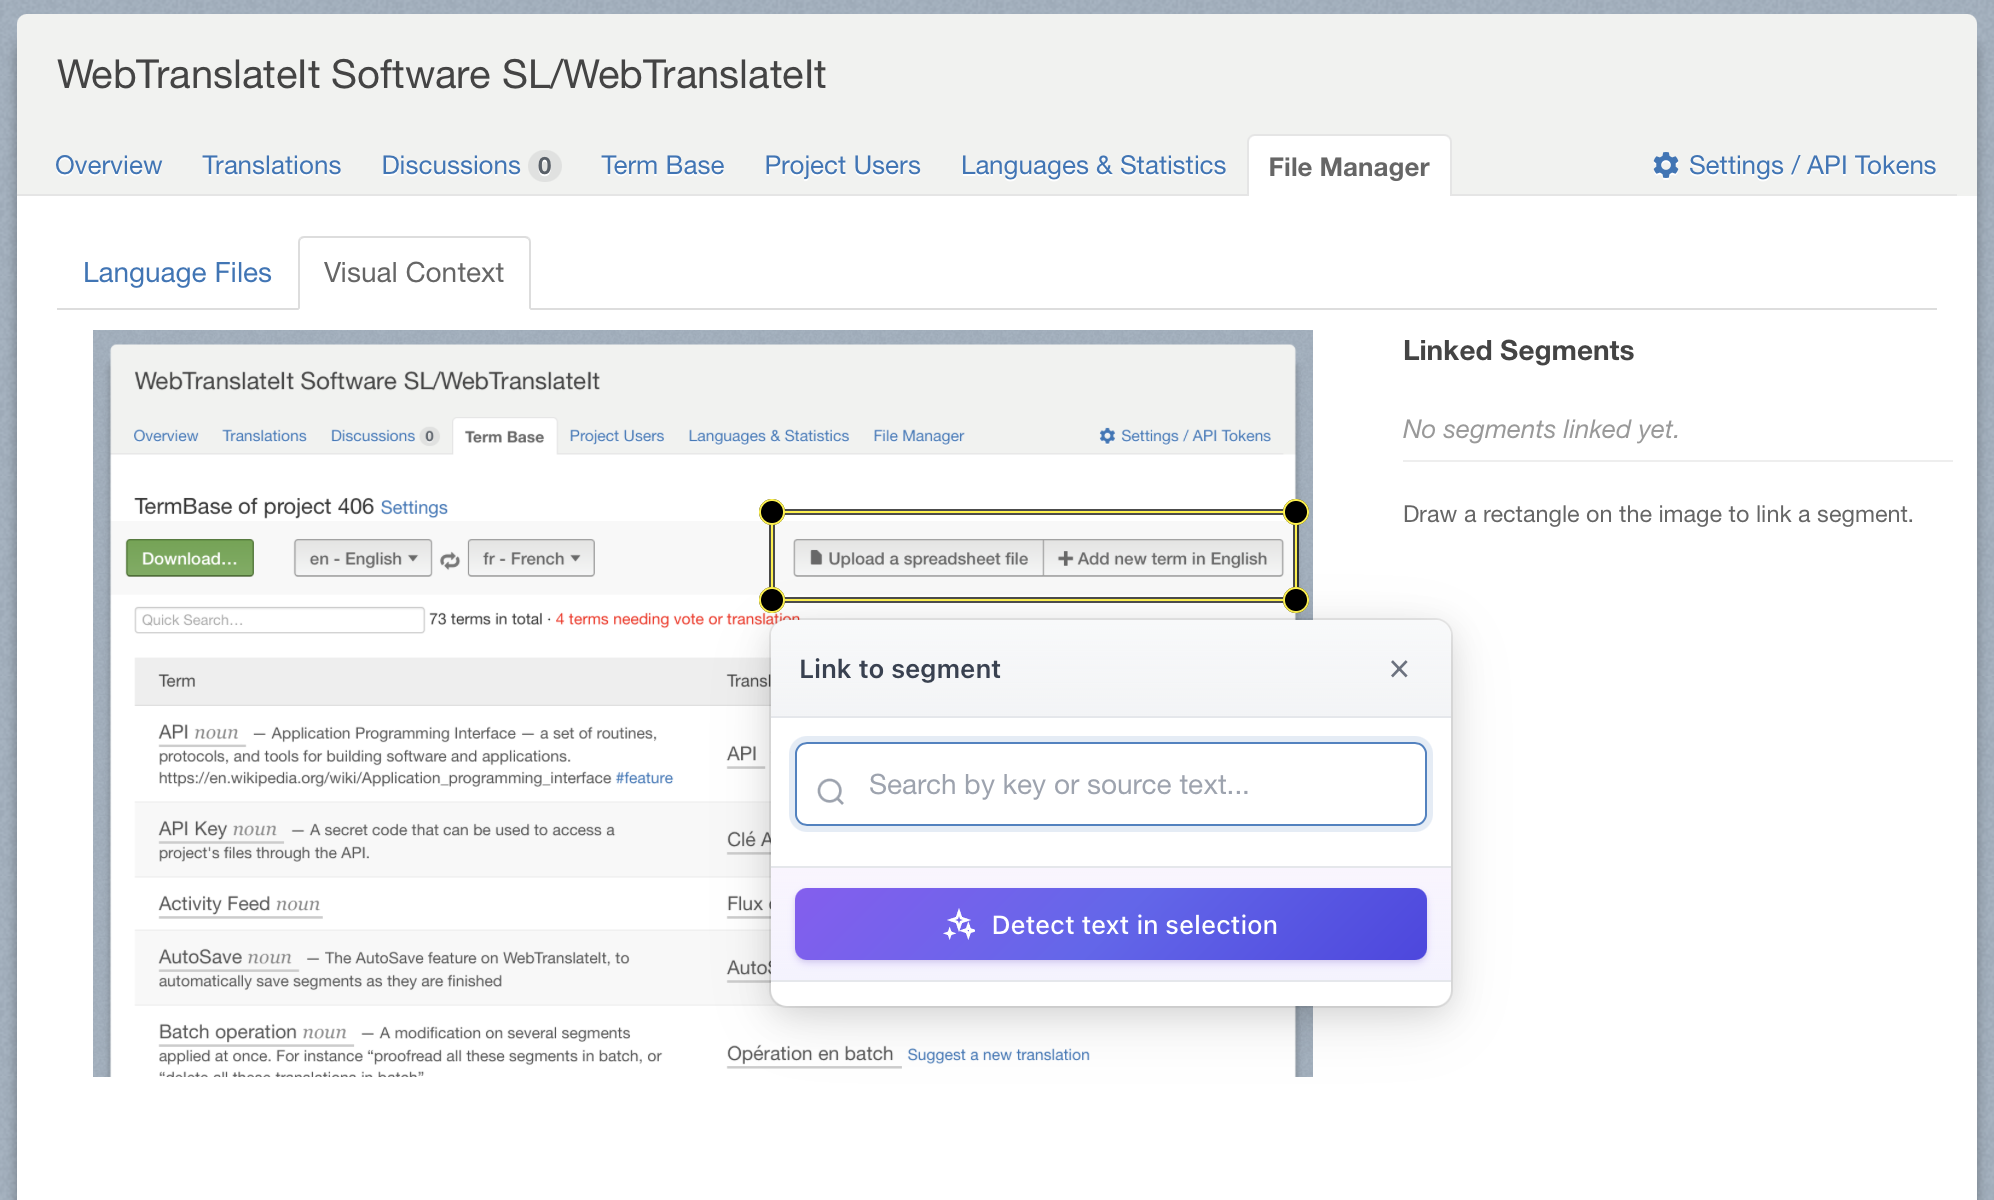
- Click and drag on the image to draw a rectangle around the text you want to annotate
- A search box appears where you can search for segments by key name or source text
- Select the segment to link it to the annotation
- The segment key appears as a label above the annotation
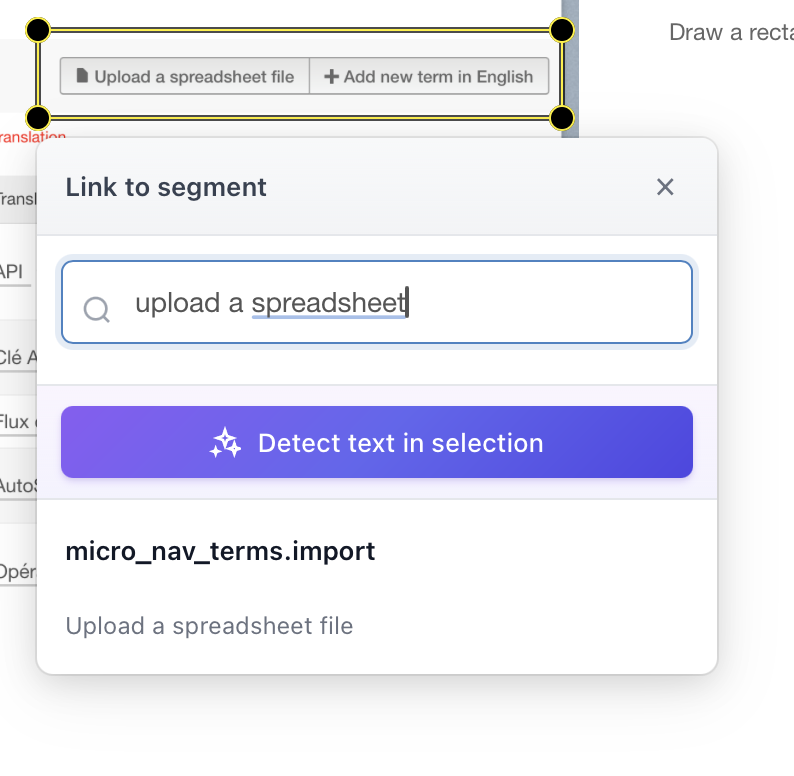
🔗Auto-Detect Text
For faster annotation, you can use the Auto-detect feature to automatically find text in your screenshot using OCR (Optical Character Recognition).
There are two ways to use auto-detection:
- Full screenshot: Click the Auto-detect Segments button in the sidebar to scan the entire screenshot
- Selected region: Draw a selection on the image, then click the Detect text in selection button that appears in the popup
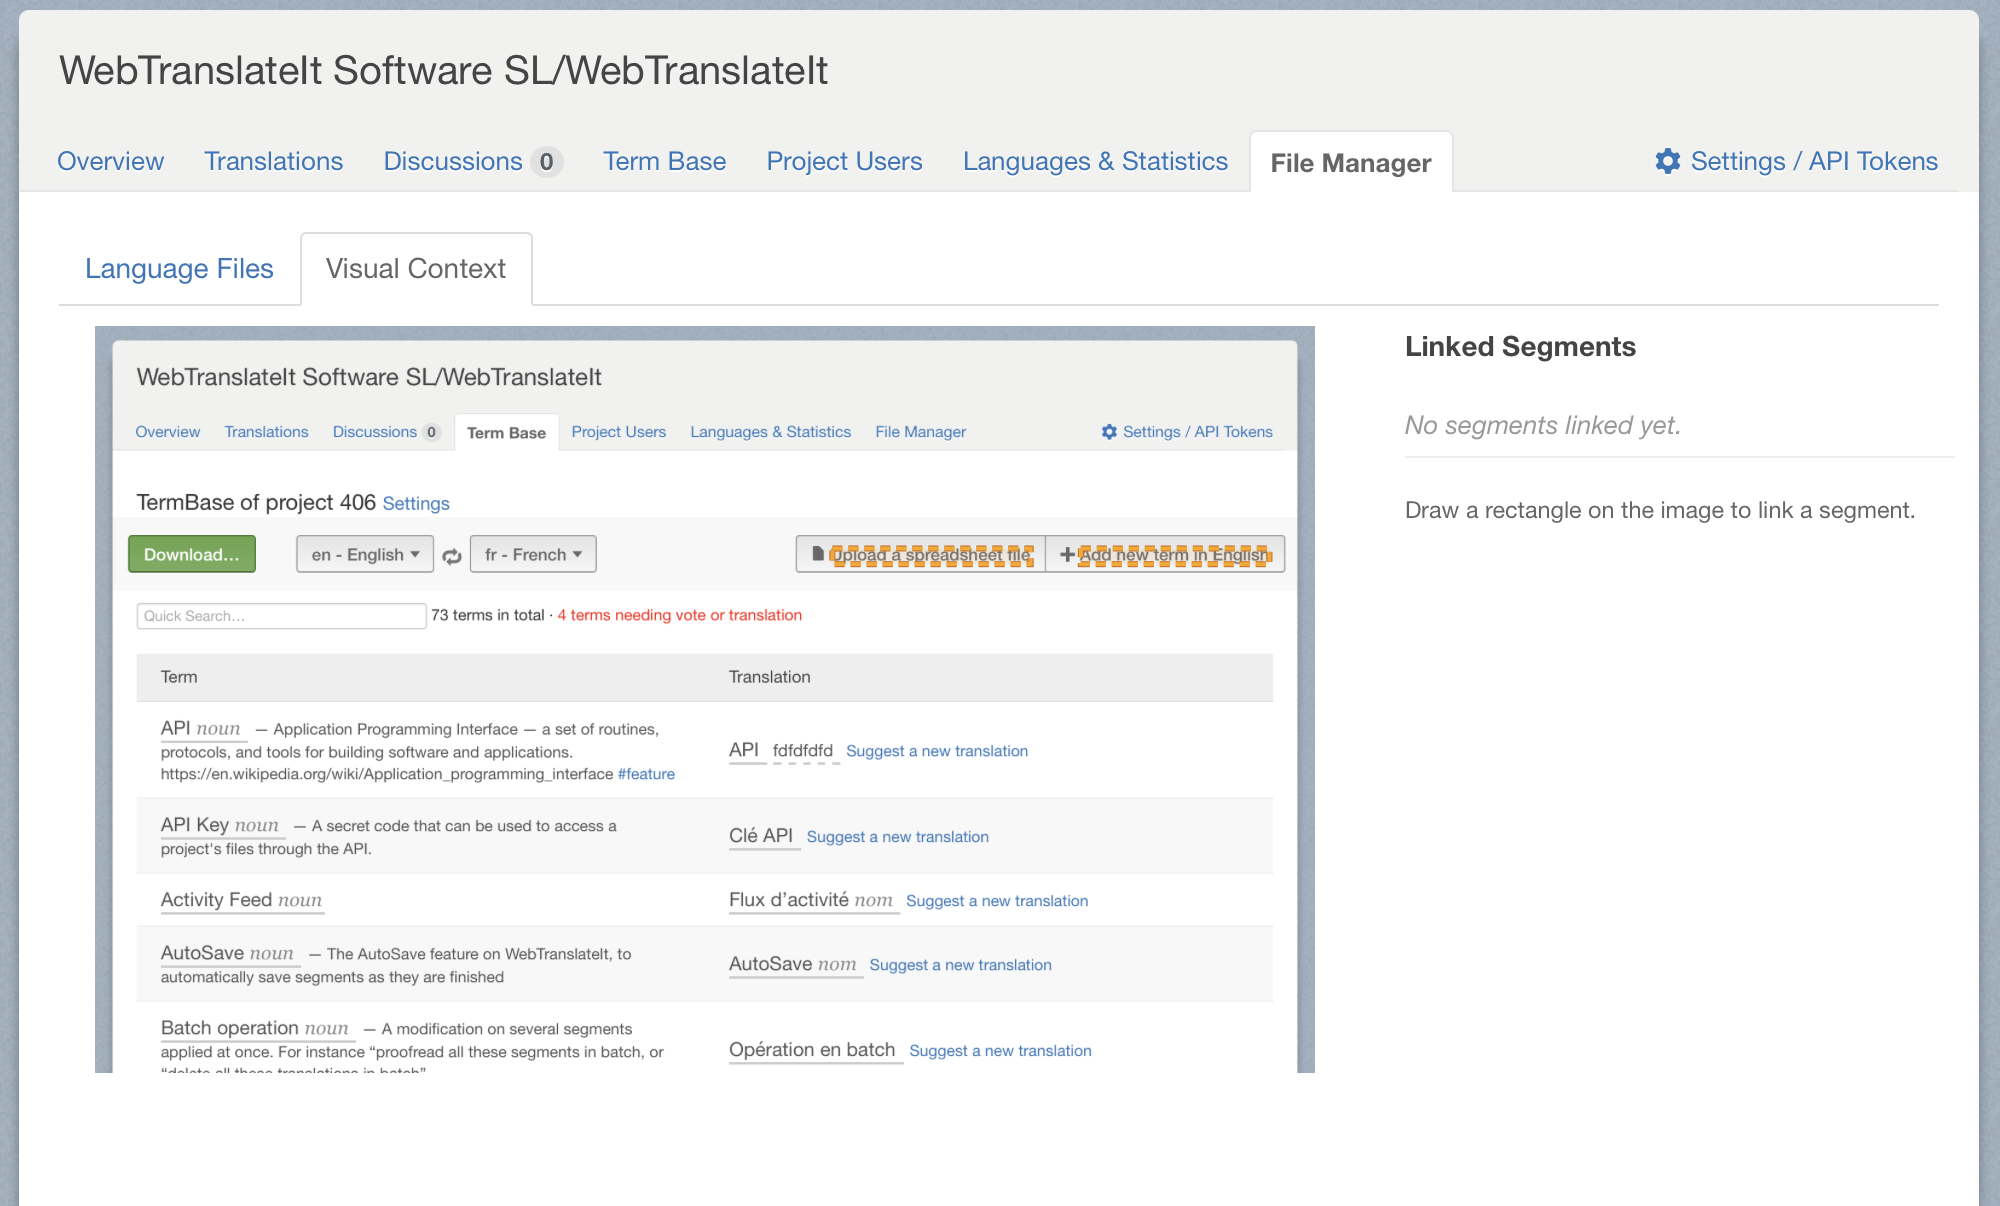
After detection, draft annotations appear with dashed purple borders. Click on a draft to open a search dropdown pre-filled with the detected text. Select a matching segment to convert the draft into a linked annotation.
To dismiss a draft annotation you don’t need, hover over it and click the dismiss button that appears.
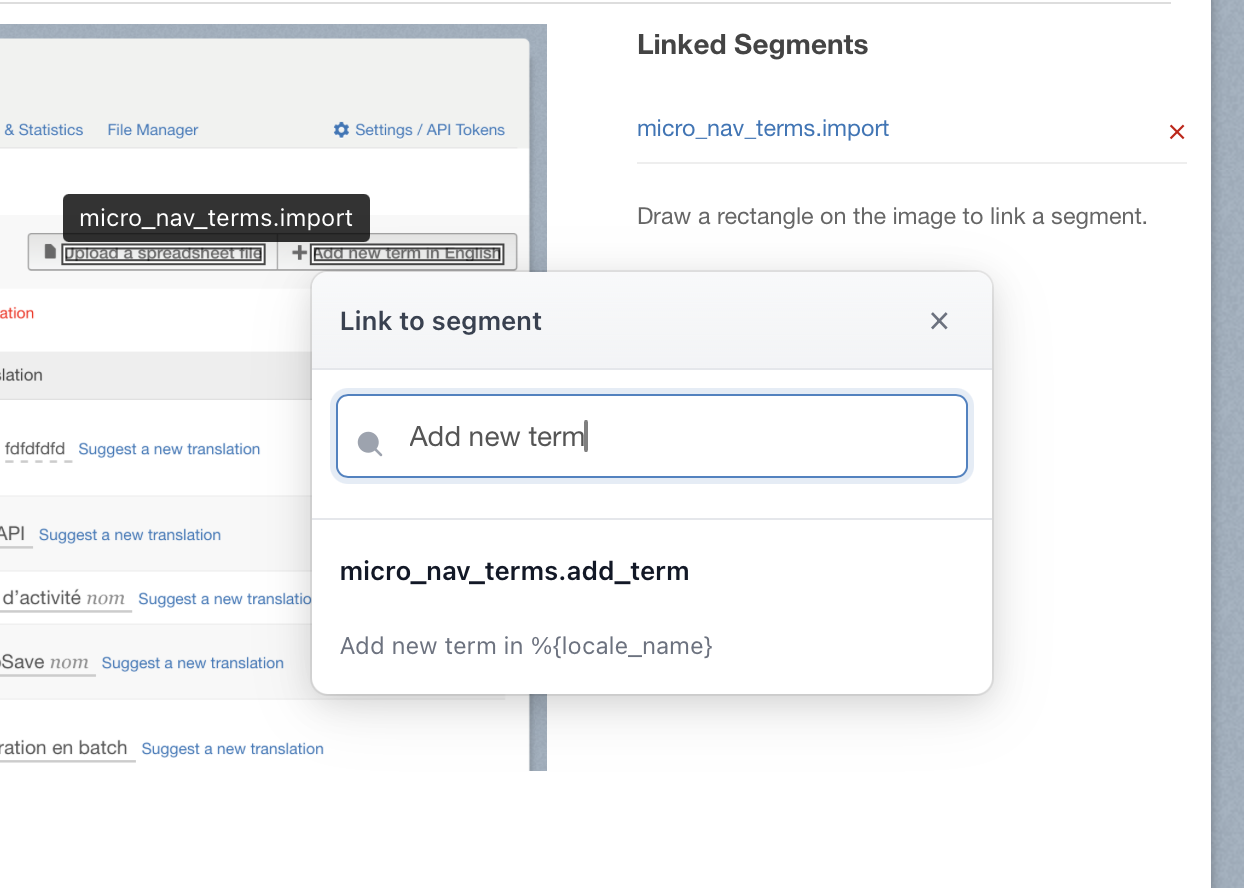
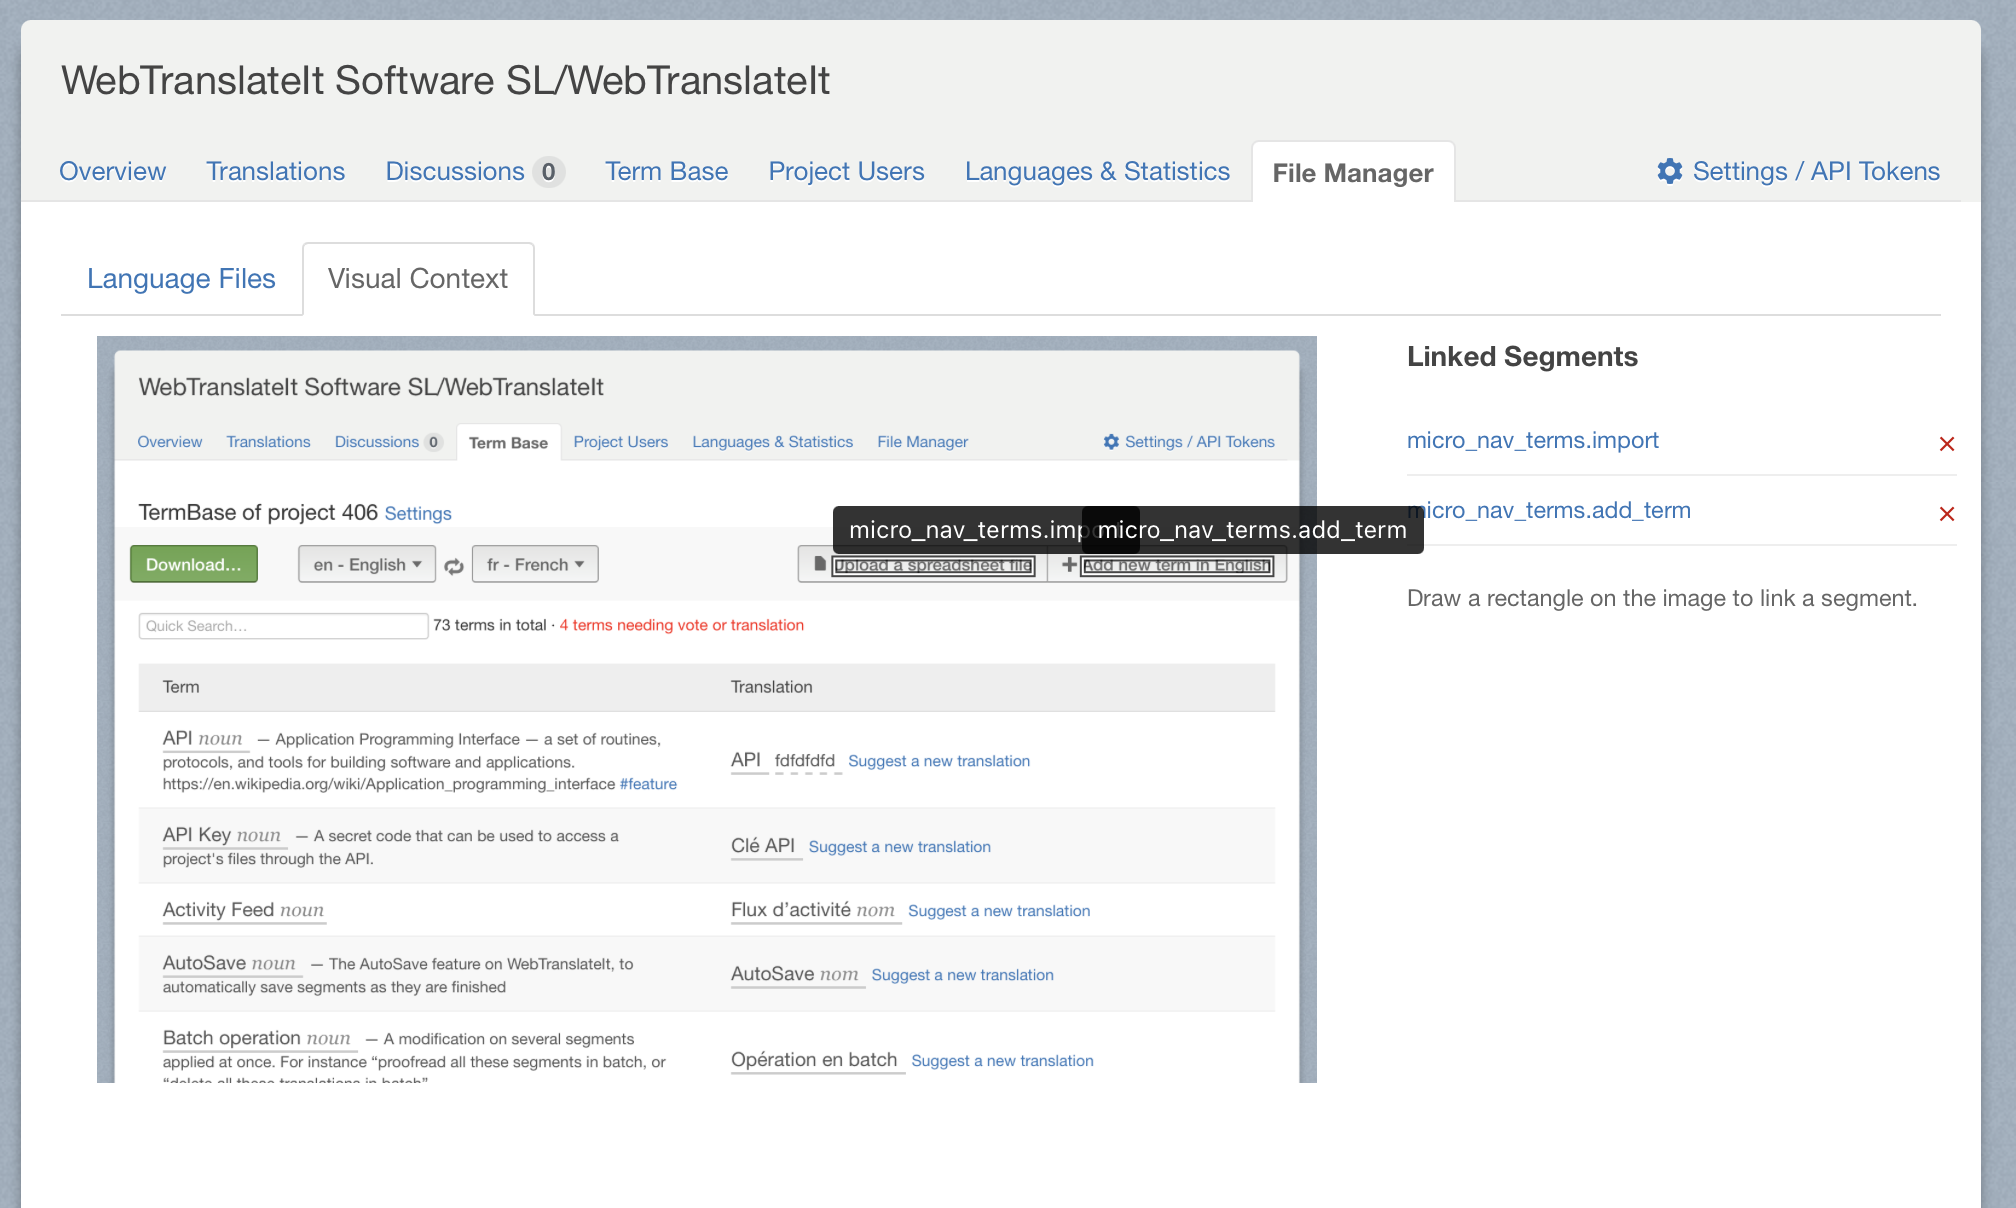
🔗Managing Annotations
- Move or resize: Click on an existing annotation to select it, then drag to move or resize
- Delete: Hover over an annotation to reveal the delete button, or use the remove link in the sidebar
- Overlapping labels: Click on a label to bring it to the front when labels overlap
- View linked segments: The sidebar shows all segments linked to this screenshot
🔗Viewing Annotations from Segments
When viewing a segment that has an annotated screenshot, you’ll see a screenshot icon next to the context information. Click it to open a modal showing the screenshot with all annotations.
In this view:
- Current segment: Highlighted in yellow with a pulsing effect
- Other annotations: Shown in blue
- Navigation: Click any annotation to jump to that segment
- Edit button: Managers can click “Edit Annotations” to modify the annotations
This allows translators to quickly see the visual context for a segment and navigate between related segments on the same screen.
🔗Benefits for Translation Quality
Screenshots with annotations provide several benefits:
- Visual context: Translators see exactly where and how text appears in your application
- Length awareness: Helps translators understand space constraints
- Consistency: Multiple segments on the same screenshot can be translated with consistent terminology
- Fewer questions: Reduces back-and-forth clarification with developers
🔗Best Practices
- Capture relevant screens: Focus on screens where context matters most
- Annotate translatable text only: Use auto-detect to quickly find text, but skip user-generated content like usernames, dates, numbers, or dynamic data that isn’t part of your translation files
- Keep screenshots updated: Update screenshots when your UI changes significantly
- Use descriptive file names: Makes it easier to find screenshots later
Next Up: Segment Lifecycle. Learn how segment statuses change throughout the translation workflow… »